Neck breaks.

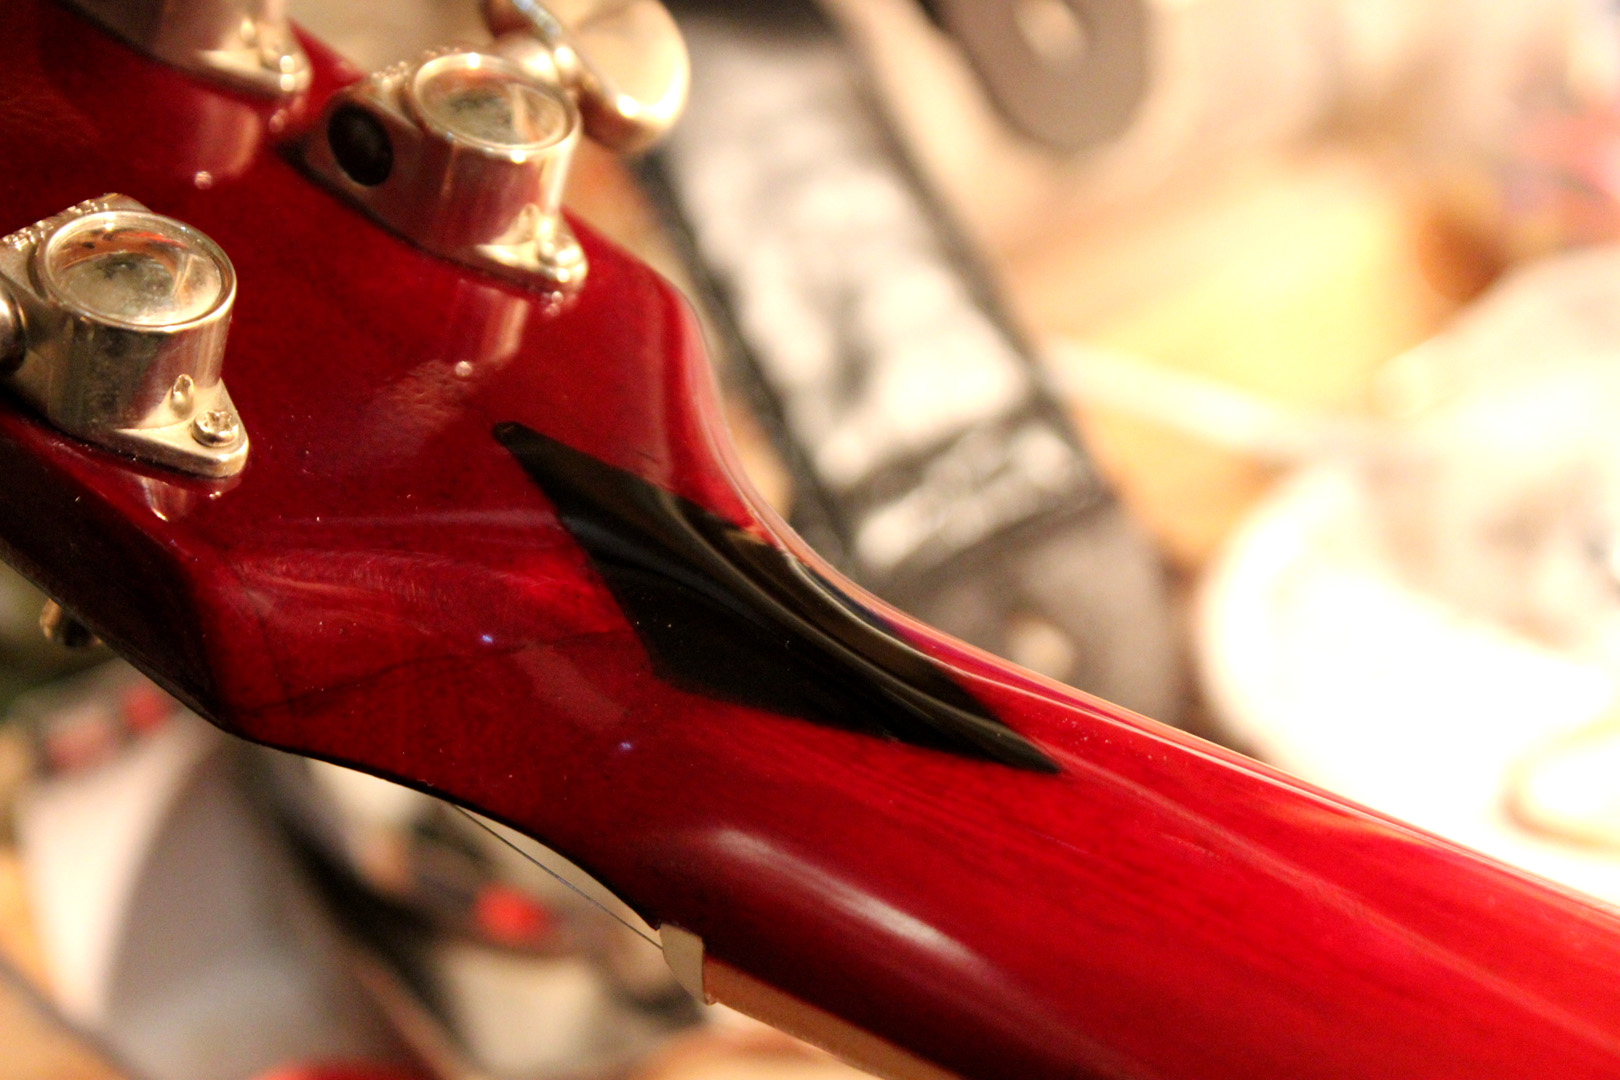
There aren’t many months without at least a couple of guitars coming in with broken necks.

Very often it’s a Gibson guitar which has taken a tumble.

While mahogany is a great wood to work with, it doesn’t cope well with sudden impact and tends to fracture just where the pitched headstock meets the neck.

This ES-335 didn’t want to go back together until I made an ebony peg to strengthen the area across the repaired break.

The increased glue-able surface area, created by the addition of the peg, was just what was needed and I’m quite pleased with the result.


gibson-diamond-fix-detail

Double Trouble

One of the more demanding jobs I’ve ever undertaken involves an old Jay Dee Gemini, (4 and 8-string) double-neck bass, for a long-standing customer of mine. The gentleman concerned has a seemingly unquenchable thirst for unusual basses, even though he already has a substantial collection – of both the weird and wonderful.

At first, it seemed like the 8-string neck simply had a bit of a hump, just above the point where the body and neck meet. It’s not uncommon to get some swelling at the end of a fret-board, over time, and the usual remedy is to remove the frets, plane the board and then install new frets. However, this job proved to be much more complicated, when it transpired that the truss-rod itself had become unstable and was on the move.

The problem was that the huge stresses, exerted by the pull of eight strings, were too much for the truss-rod anchor which was in the process of being pulled, not only forwards into the mahogany neck but also upwards, against the underside of the ebony fret-board, causing the wood to compress, balloon then split.

The only option was to remove the affected section of fret-board, and create a means of reinforcement for the existing anchor, carefully negotiating the tiny fibre-optic cables, used to illuminate the side-dot position-markers, along the length of the neck.

jd1

Being lighter and more bend-resistant than steel, I used aluminium to make both an additional, supporting anchor and a plate to contain any remaining upward forces, between the neck and fret-board. I felt this “belt and braces” approach was required – for maximum strength.

jd2

Once both items were installed I had to carefully refit the original section of fret-board, reducing its thickness by exactly the same amount as that of the plate, before replacing the original neck-binding which covers both the edges of the recessed mahogany, and the aluminium-ebony sandwich.

I’m happy to say that everything worked a treat and both necks are now doing well.

jd3

Gibson Re-issue Melody Maker

mm

When I saw one of these guitars hanging on the wall at Kenny’s Music I just had to have it. Mine is black, has a resonant one-piece body and a nicely chunky neck.
These instruments were originally intended as affordable “student” models so it’s great to see things come full-circle. Once again there exists an economically accessible path into ownership of a genuine Gibson.

Never mind the “Student” tag – these are perfectly valid guitars in their own right. I certainly love mine and its only shortcoming was the lack of a second pick-up with which to create a contrast to the brightness of the original single-coil unit, located at the bridge.
(There is in fact a two pick-up model available but I’ve always believed, when choosing a guitar, pictures on the internet are just not good enough – you need to be able to feel the goods and this one felt great).

After some head scratching I remembered I had some new/old-stock, USA-made Hamer pick-ups, with very narrow pole-piece spacing, tucked away somewhere. As luck would have it the spacing was perfect and I set about figuring out the best way to fit one into the “neck position” on my Melody Maker.

In its standard form the Hamer unit would have extended beyond the footprint of the existing scratch-plate, creating a noticeably clumsy look, but after detaching its metal base and placing the pick-up in situ, I achieved a perfect fit.
Unusually the magnetic slug pole-pieces on these pick-ups protrude almost half an inch below their fibre-board former. I found that by drilling six slightly undersized holes in the body of the guitar, I was able to press-fit the pick-up so that it looked like an original feature.
All that was left was to very carefully cut a recess into the rim of the body for a Tele-type jack-socket and fit a pick-up selector switch into the original jack-socket site.

The guitar now has three separate sounds and a unique look thanks to the addition of two metal control knobs – each with a ruby red centre – and a vintage yellow selector switch tip.

I like to think it looks like a Pirate’s guitar and have even contemplated adding a skull and crossbones mother-of-pearl inlay. Either way, I feel I’ve succeeded in making a good guitar great and enjoyed myself in the process. Can’t say fairer than that!